Key takeaways
- Record 1920×1080, 30 fps constant, 16:9. That clears Udemy's 720p floor, Skillshare's 1080p ask and Thinkific's 640–3840 px window in one setting. Not 4K, not 60 fps.
- Export MP4 / H.264 video + AAC audio, 5,000–8,000 kbps, stereo — under 4 GB per file for Udemy, 2 GB for Thinkific.
- Udemy's publishing floor: ≥ 30 minutes of video across ≥ 5 lectures. Skillshare classes average 20–60 minutes split into 2–8 minute lessons.
- Buy exactly one thing: an external mic (Fifine K669 ≈ $27, Samson Q2U ≈ $70). Audio is what the quality checklists are actually about.
- Mono is the classic rejection. Udemy requires an audio track that plays from both left and right channels — check the exported file, not the recorder's meter.
- Make your own captions. Udemy's auto-subtitles only kick in after 20 enrolments; upload a
.vttper lecture and your first students aren't the ones without them. - Budget the edit, not the studio. ~20 minutes of trimming, filler-word removal and captioning per finished lecture beats any hardware you could buy.
The short version
To record a sellable online course on one laptop: outline it as 5–15 lectures of 2–8 minutes, buy one external microphone, set your display to 1920×1080, and record each lecture as a single screen capture at 1080p / 30 fps with your mic on a stereo track and your webcam in the corner if you want it. Then trim the false starts, cut the silences and filler words, generate captions, and export MP4 with the H.264 video codec and AAC audio at 5,000–8,000 kbps, keeping each file under the platform's cap. Udemy will accept that and more: its floor is 720p, 16:9, under 4 GB per file, with at least 30 minutes of content across at least 5 lectures.
What follows is that pipeline in full — the numbers, where they come from, and the four or five places where a first course actually goes wrong. Everything here assumes a normal laptop, a room with a door, and no budget for a studio.
What the platforms actually require
Start here, because the requirements are far lower than the internet implies, and because knowing the floor tells you which decisions don't matter. These are the published standards, current as of August 2026.
| Udemy | Skillshare | Thinkific | Teachable | |
|---|---|---|---|---|
| Resolution | ≥ 720p, 1080p preferred | 1080p or above | 640–3840 px wide (1080p typical) | 1080p in practice |
| Aspect | 16:9 horizontal, required | 16:9 widescreen | Any accepted; 16:9 recommended | 16:9 |
| Container / codec | .mp4 (recommended), .mov, .wmv — H.264 + AAC or MP3 | MP4 / H.264 | H.264 required; .mp4 / .mov / .m4v | MP4 / H.264 |
| Bitrate | Not specified | Not specified | 5,000–8,000 kbps | Not specified |
| Frame rate | Not specified | Not specified | Constant, 15–60 fps | Not specified |
| Audio | Must play from both channels; not distracting | Clear; no hums, crackle or echo | AAC, 44.1 kHz, 2-channel stereo | AAC stereo |
| File size | < 4.0 GB per video | Not published | < 2 GB per video | Much higher (commonly cited at 20 GB — check your plan) |
| Course minimum | 30 min of video, 5+ lectures | 2 min total to publish; 20–60 min typical | None (your own site) | None (your own site) |
Two things fall out of that table. First, one export preset satisfies all of them: 1920×1080, 30 fps constant, H.264 in MP4, AAC stereo at 44.1 kHz, video bitrate around 6,000 kbps. Build that preset once and stop thinking about specs. Second, almost every published requirement is about audio and format, not about production value. Nobody asks for a three-point lighting rig. They ask for a stereo track without echo in it.
What one laptop can and can't do
The honest breakdown, in order of how much each item changes the finished video:
- An external microphone — buy this, and only this. Your laptop's built-in mic sits inside a fan-cooled aluminium box, points at the ceiling, and is around 50 cm from your mouth. Everything wrong with amateur course audio — the hollow room sound, the hiss, the fan, the keyboard — comes from those three facts. A USB dynamic mic like the Samson Q2U (listed around $69.95) rejects room noise well and is forgiving of an untreated room; a Fifine K669 at roughly $27 is a real step up from built-in for the price of lunch. Even a $20 wired lavalier clipped 15 cm below your chin beats the laptop, because distance matters more than capsule quality.
- A quiet 40 minutes. Free, and worth more than any hardware. Record when the building is quiet; close the window; put a coat or duvet on the wall behind the mic if the room rings.
- The laptop's own screen and webcam. Genuinely fine. For a software, spreadsheet, code, slides or maths course, the screen capture is the video — the webcam is a small trust-building picture-in-picture, not the main image. Sit facing a window and you have solved lighting.
- Not needed: a DSLR, a capture card, key lights, a green screen, an acoustic booth, a second monitor, or a subscription NLE. Every one of those is a real improvement to a course that is already good, and none of them fixes a course that isn't.
The one genuine laptop constraint is sustained encoding. Recording 1080p30 with hardware encoding is light work for any machine from the last five or six years. Recording a scaled 4K display, or 60 fps, or writing the capture into a cloud-synced folder, is where dropped frames and stutter come from. Record 1080p30 to a local folder and the constraint disappears.
Step 1: cut the course into recordable pieces
Before any settings: an outline where every line is one file you can record in one take. This step is what makes the rest of the pipeline survivable.
Aim for 2–8 minute lectures — the shape Skillshare explicitly describes (classes averaging 20–60 minutes of content broken into short 2–8 minute lessons) and the shape that works everywhere else. Three practical reasons, none of them about attention span:
- A short lecture is a short re-record. When you fluff a take at minute 4 of a 6-minute file, you shrug and start again. At minute 22 of a 30-minute file, you start editing around it, and that is where a weekend goes.
- A short lecture is a place to stop. Students resume courses at lecture boundaries. A 25-minute monolith has no boundaries in it.
- A short lecture holds exactly one idea. If your outline line needs the word "and", it's two lectures. This constraint improves courses more than any camera.
Then check the floor: Udemy will not let you publish under 30 minutes of video across at least 5 lectures, so a realistic first course is 8–15 lectures totalling 45–90 minutes, grouped into 3–5 sections. Write the outline as a list of file names — 02-03-installing-the-plugin.mp4 — and you have your shot list, your section structure and your progress bar in one artefact.
Two more planning decisions worth making now, not later:
- Script or bullets? Bullets for anything you demonstrate; a written script for the first and last lecture of each section, where you set up and close a topic and where waffle is most expensive. Fully scripting a demo lecture makes you sound like you're reading, which students detect instantly.
- Your promo video is a separate job. Udemy's guidance is that the promotional video should be short — ideally under two minutes. Record it last, when you know what the course actually turned out to be, and when you have stopped sounding nervous on camera.
Step 2: set the machine up once
Do this once, keep it for the whole course, and you never think about it again:
- Display: 1920×1080, scaling 100–125%. On a Retina Mac the default "looks like" resolution isn't 1080p, so either pick a 1920×1080 option in System Settings → Displays or record a fixed 16:9 region. Setting this before you record matters: changing resolution mid-take can resize or garble the capture.
- Do Not Disturb on, chat apps quit, OS updates paused, laptop plugged in. Do Not Disturb hides banners only — it will not stop a Teams call window, a Chrome "relaunch to update" dialog, or the low-battery warning.
- Desktop icons hidden, taskbar/Dock auto-hidden, bookmarks bar off, unrelated tabs closed. A course is watched by hundreds of people who can pause and zoom.
- System sounds off, sleep and screen saver set to Never.
- Output folder: a local, non-synced directory. Not Dropbox, not iCloud Drive, not OneDrive. Sync clients grabbing a file that's still being written are a top cause of corrupt captures.
The exact settings paths for Windows 11/10 and macOS — including the pop-ups that Do Not Disturb doesn't block — are in our lecture recording setup checklist. It's a two-minute pass and it is the difference between eleven clean lectures and eleven lectures with someone's message preview in them.
Step 3: record to spec, not to taste
Settings, then habits.
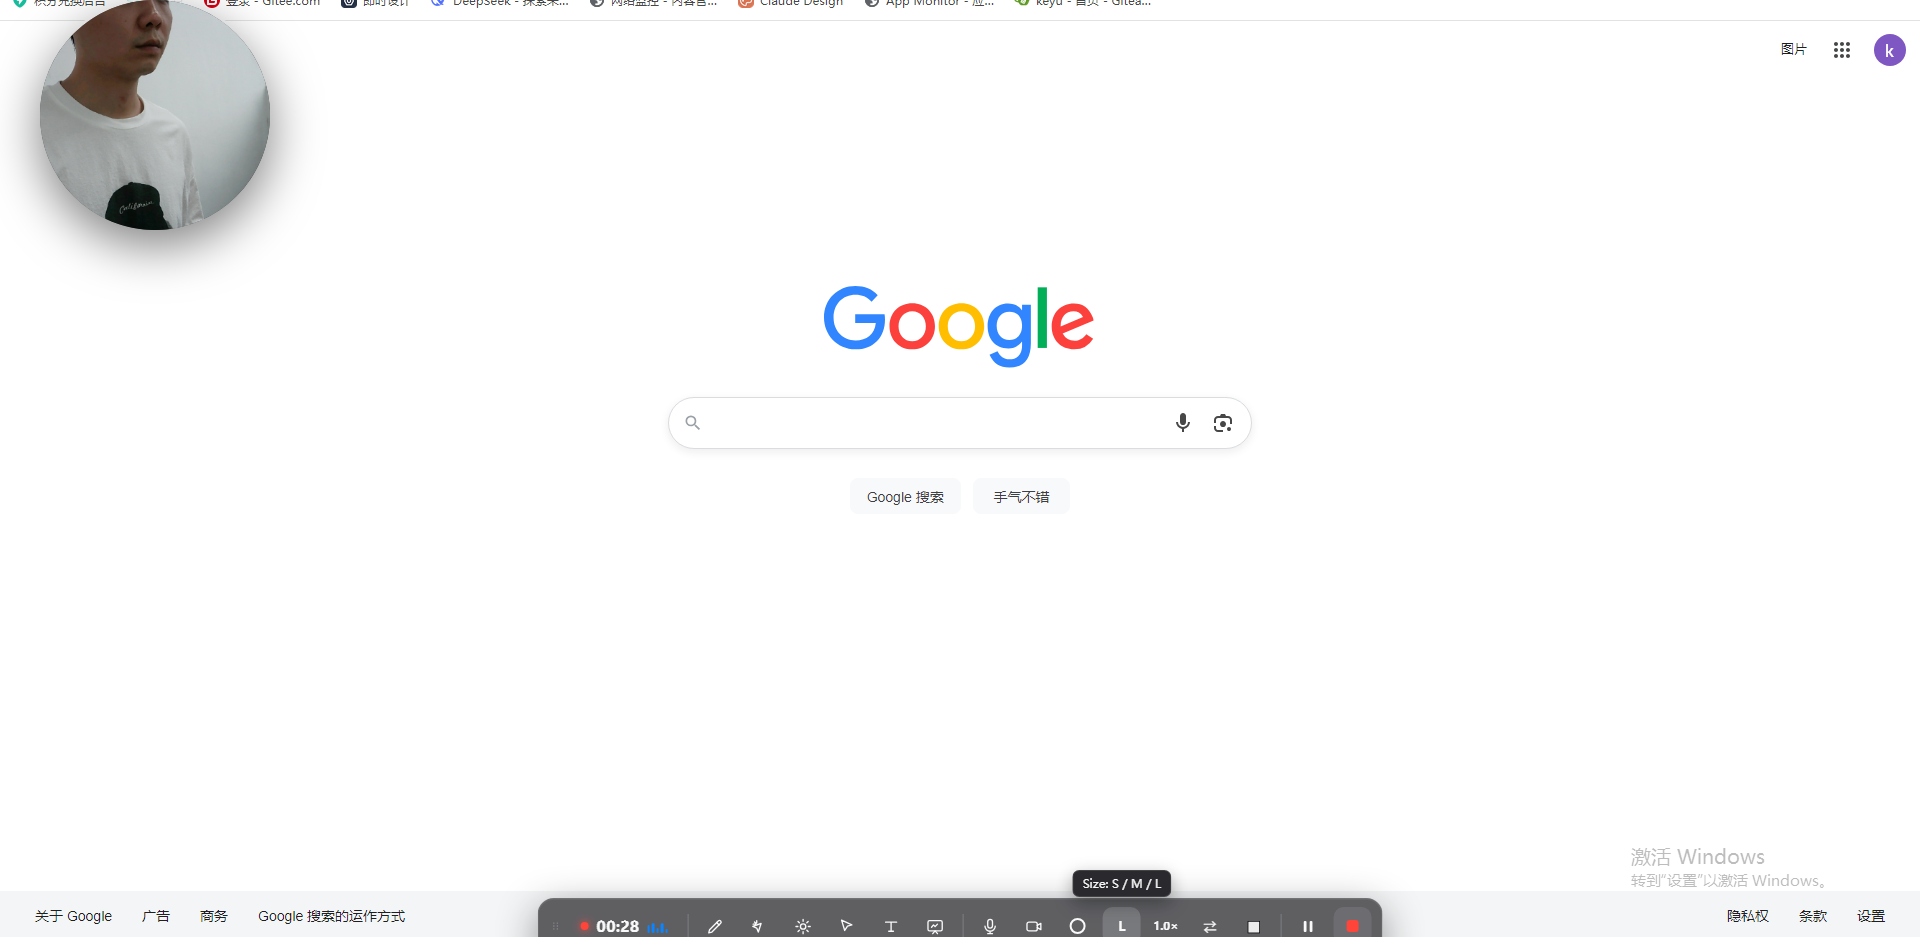
Settings. 1920×1080, 30 fps constant, hardware encoding on, screen audio only if the lesson needs it, microphone always. Skip 60 fps: slides, code and menus are slow-moving, high-contrast images — the easy case for a codec — so 60 fps roughly doubles the file for no visible gain. Skip 4K: it is four times the data for something students stream at 1080p, and on a laptop it's the setting most likely to drop frames.
Capture a window or a fixed region, not the whole desktop. A locked 16:9 region gives you a clean 1080p frame on any machine and puts the Dock, the taskbar and any stray banner out of shot by construction.
Webcam. If your face is in the course, keep it as a small picture-in-picture parked in a corner your content never reaches — bottom-right for slides, bottom-left if you write on screen. Frame yourself with the lens at eye level (a stack of books under the laptop) and a window in front of you, not behind.
Habits that save the most time:
- Record a 60-second test at your real settings before lecture one, then open the exported file and check its dimensions, duration and audio — not the recorder's preview. This one habit catches more than everything else combined.
- One lecture, one file. Don't record three lessons into one take intending to split later; you will spend longer splitting than re-recording.
- Fluff a line? Pause, breathe, say the sentence again from the start. Don't stop the recording. A doubled sentence is a two-second cut in the edit; a second file is a merge job.
- Leave two seconds of silence at the top and tail of every take. It gives you clean cut points and stops your first word being clipped.
- Say the numbers out loud. "Click Settings, then Advanced" — because the captions carry what a compressed screenshot loses, and because it's how your course becomes searchable.
If your course is slide-based, the mechanics of presenting without leaking your speaker notes are covered in recording a PowerPoint without showing your notes. If you teach anything with derivations, recording handwriting and maths on screen covers the device-and-canvas chain.
Step 4: the audio track, which is what gets you rejected
Read the platform quality checklists closely and they are mostly audio documents. Udemy requires an audio track that plays from both the left and right channels and audio that isn't distracting; Skillshare asks for audio free of "hums, fuzziness, crackling, or echoes"; Thinkific specifies AAC, 44.1 kHz, 2-channel stereo. Four things to get right:
- Mono is the classic rejection. Plug in a mono USB mic or a single-channel interface and you can end up with an export where the voice comes out of the left speaker only — perfectly audible in your headphones if you're used to it, and immediately flagged by review. Udemy's own advice is to confirm your mic's output is stereo, not mono. Test it in the exported file, in headphones, by pulling one earcup off. If the voice is in one ear, set your recorder or editor to duplicate the mono source across both channels.
- Distance beats equipment. Mouth 15–20 cm from the mic, slightly off-axis so plosives don't thump. Halving the distance to the mic roughly halves how much room you hear. This is why a $27 mic on a boom outperforms a $300 mic across the desk.
- Echo is the hardest to fix later, so fix it now. A hard-floored, bare-walled room "rings", and no amount of editing removes it convincingly. Record in a room with a rug, curtains and a sofa; if you only have the bare room, hang a duvet on a door behind you and sit closer to the mic. A dynamic mic (the Q2U style) tolerates a bad room far better than a condenser, which is exactly the opposite of what the spec sheets suggest.
- Kill the sources you control. Laptop on a folded towel to decouple fan noise and key clicks; phone on silent and out of the room; fridge, aircon and the washing machine off. A 40-minute recording session is short enough to just switch things off.
Levels: aim for your speaking voice to sit clearly in the meter without ever touching the top. Too quiet is the safer failure — you can raise a quiet clean track in the edit, but you can't un-clip a distorted one. And record one 10-second sample of your empty room before the first lecture: it's a noise profile you can use to remove hiss consistently across every file.
Step 5: the edit pass that takes 20 minutes
This is the part the studio-shot articles skip and the part that actually separates a course that sells from one that doesn't. Budget roughly 20 minutes of editing per finished lecture. Not colour grading — four mechanical operations:
- Trim the head and tail. Every take starts with you reaching for the keyboard and ends with you reaching back. Cut to the first real word and the last.
- Cut the doubled sentences. The retakes you deliberately left in. Straight cuts; nobody needs a transition.
- Remove the long silences. Pauses while you type, click, wait for a page to load or think. Compressed sensibly, this alone typically removes 10–20% of a screen-based lecture's running time and is the single biggest perceived-pace improvement available.
- Remove filler words. "Um", "uh", "so", "basically", "kind of". You will not notice them while speaking and you cannot un-notice them on playback.

What not to do on a first course: animated transitions, a music bed under narration (it fights your voice and complicates captions), stock B-roll, a 15-second branded intro on every lecture. Students on a paid course rate "gets to the point" far above "looks produced", and an intro sting they watch eleven times is a net negative. If you want a consistent opening, make it three seconds.
Then a consistency pass across the whole course, which is a course-level job rather than a per-file one: the same intro line, the same sign-off, the same webcam position, roughly the same loudness. Play the first 20 seconds of every lecture back to back — if the volume jumps between files, you've found the fix that most improves your reviews.
Step 6: captions — and Udemy's 20-enrolment trap
Captions are the highest-return, lowest-effort item on this list, and there's a specific reason not to leave them to the platform.
Udemy auto-generates subtitles in English, French, German, Italian, Japanese, Spanish and Portuguese — but only after a course has received 20 or more enrolments on the marketplace. That timing is exactly backwards for a new instructor: your first twenty students, the ones who write your first reviews, are precisely the cohort that sees no captions. Udemy accepts instructor-uploaded .vtt caption files and uses them instead of the auto-generated ones, and requires subtitles for English, Spanish, Portuguese, French and Italian courses in the Udemy Business collection.
So generate them yourself, as part of the edit pass:
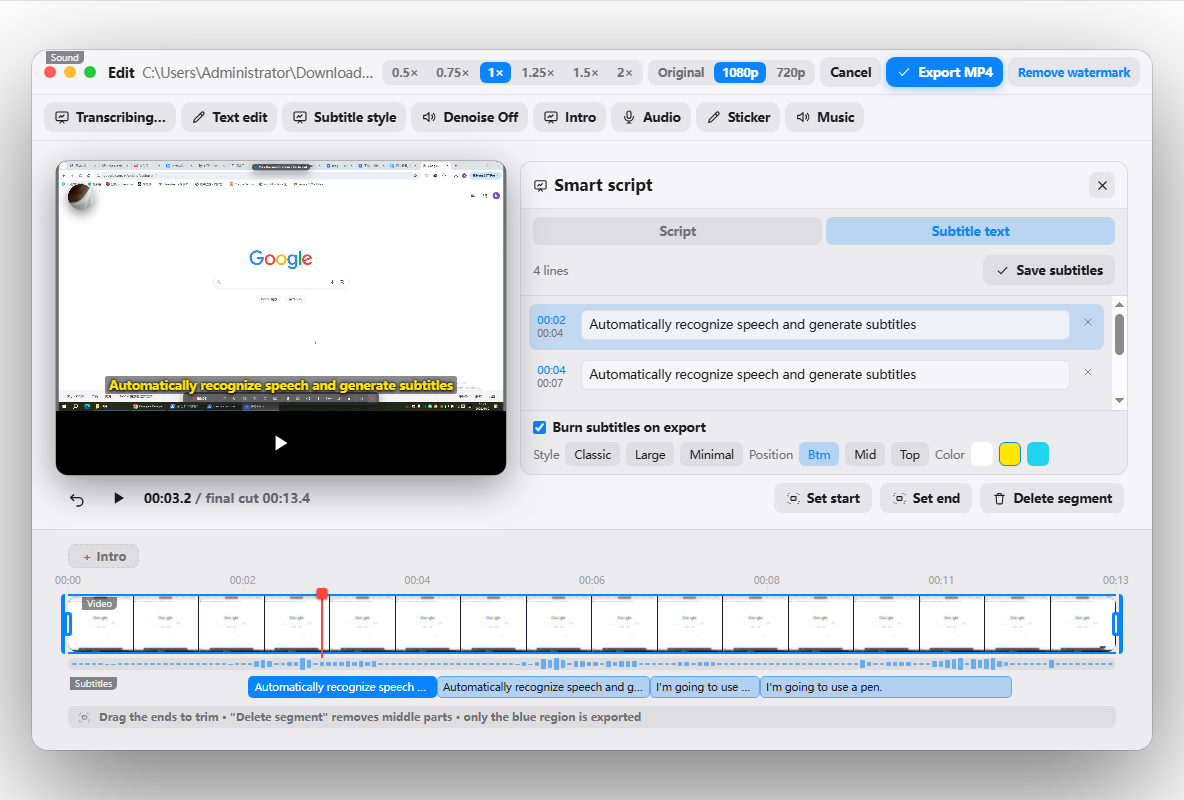
- Transcribe the lecture (locally, if your recorder can — it's faster and nothing leaves your machine).
- Fix the ten or so proper nouns and technical terms the recogniser mangles. Every course has them; keep a list and it takes two minutes per lecture after the third file.
- Export .vtt (Udemy's format) or .srt, and upload it alongside the video.
Three payoffs beyond compliance: a large share of students watch with sound off or in a second language; the caption text is what makes a lecture findable inside a course search; and reading your own transcript is the fastest way to notice that lecture 4 takes ninety seconds to reach the point. More on the mechanics in adding subtitles automatically.
Step 7: export settings per platform
One preset covers everything. Build it, name it, forget it:
| Setting | Value | Why |
|---|---|---|
| Container | MP4 | Udemy recommends it explicitly; uploading works best with MP4 |
| Video codec | H.264 | Required by Thinkific, recommended by Udemy, universal elsewhere |
| Resolution | 1920×1080, 16:9 | Above Udemy's 720p floor, meets Skillshare's 1080p |
| Frame rate | 30 fps, constant | Thinkific requires a constant rate (15–60 fps); variable frame rate causes drift |
| Video bitrate | 5,000–8,000 kbps | Thinkific's published range; ~6,000 is the sweet spot for slides and screen |
| Audio codec | AAC, 44.1 kHz, stereo | Thinkific's spec; satisfies Udemy's both-channels requirement |
| File size | < 2 GB per lecture | Clears Thinkific's 2 GB cap and Udemy's 4 GB cap at once |
At ~6,000 kbps, an 8-minute lecture lands around 360 MB, so the caps are only a risk if you export a 40-minute lecture at high bitrate — another argument for short lessons. Name files so they sort correctly (01-02-topic.mp4), and keep the originals: you will want to re-cut lecture 3 after the first ten reviews.
Before you upload, open one finished file and check four things: dimensions read 1920×1080; audio plays in both ears; the whole lecture is there (a truncated export is the classic silent failure); and the smallest text on screen is legible when the video is played in a small window.
A realistic two-weekend schedule
The reason first courses die isn't quality — it's that "record a course" has no obvious end. Give it a shape:
| Session | Do | Time |
|---|---|---|
| Evening 1 | Outline: sections and 8–15 lecture titles, each one idea. Write the file names. | 1–2 h |
| Evening 2 | Set up the machine, mic and recorder. Record a 60-second test; submit it to Udemy's Test Video service if that's your platform. | 1 h |
| Saturday | Record sections 1 and 2 — roughly 6–8 lectures. Record in blocks of three, then break. | 3–4 h |
| Sunday | Record the rest, including the "what's next" closer. | 3–4 h |
| Weekday evenings | Edit two or three lectures a night: trim, silences, filler, captions, export. | ~20 min per lecture |
| Weekend 2 | Upload, write descriptions, record the promo video last, publish. | 3–4 h |
Record in the same clothes and the same seat across both days, keep the window blind at the same height, and don't move the mic — continuity between takes recorded a week apart is the one thing that genuinely looks unprofessional and cannot be fixed in the edit.
Seven ways first courses fail review
- Mono audio. Voice out of one speaker. Udemy requires both channels; check the exported file in headphones.
- Room echo. The only defect that genuinely can't be edited out. Move rooms, add soft furnishings, get closer to the mic.
- A portrait or non-16:9 frame. Recording a phone-shaped region, or a Retina display's odd native ratio, and ending up with pillarboxing. Udemy requires 16:9 horizontal.
- Text too small to read. An IDE at your comfortable 27-inch size is unreadable on a 6-inch phone after compression. Zoom the app to 125–150% before recording, not after.
- Under the publishing floor. Four lectures totalling 24 minutes won't publish on Udemy; the bar is 5 lectures and 30 minutes.
- Something on screen that shouldn't be. A notification preview, a bookmark bar, another student's name, a watermark or promotional link (Udemy has specific standards restricting watermarks and links in video).
- Never finishing. The most common failure by an enormous margin. Ship a 45-minute course with eleven tight lectures and improve it from real feedback, rather than perfecting a 12-hour course nobody has seen.
All of the above is doable with a free recorder, an editor and a caption tool — it's just three apps and three exports per lecture. Penbeam collapses that into one: record screen, webcam and microphone together at 1080p with annotation and zoom while you talk; then, in the same app, trim the take, cut silences and filler words in one pass, generate subtitles locally and offline (nothing is uploaded) and export SRT/VTT, and render an MP4 to the H.264 + AAC preset above. It runs on macOS 12.3+ and Windows 10+, with a free tier (10 minutes per recording, watermarked) and Pro from $39.99/year, education discount included. See the features page, compare on pricing, or get it from the download page. If you're building a course out of existing classes rather than from scratch, making educational videos and recording a lecture are the neighbouring guides.
FAQ
How do I record an online course at home with just a laptop?
Seven steps. (1) Outline the course as 5–15 lectures of 2–8 minutes each, because platforms and students both prefer short lessons — Udemy requires at least 30 minutes of video across at least 5 lectures before you can publish. (2) Buy one external microphone; a USB dynamic mic such as the Samson Q2U is listed around $70 and a Fifine K669 around $27, and it's the only piece of hardware that reliably changes the outcome. (3) Set the display to 1920×1080, turn on Do Not Disturb, quit chat apps and plug the laptop in. (4) Record the screen at 1920×1080, 30 fps constant, with webcam picture-in-picture if you want your face in it, one lecture per take. (5) Trim the false starts, cut the silences and filler words. (6) Generate captions and export a .vtt or .srt file. (7) Export MP4 with the H.264 video codec and AAC audio, 5,000–8,000 kbps, keeping each file under the platform's cap — 4 GB on Udemy, 2 GB on Thinkific. A studio, a camera and lights are all optional; the microphone and the edit pass are not.
What are Udemy's video and audio requirements for a course?
Udemy's published standards: video must be high definition at a minimum of 720p, oriented horizontally at a 16:9 aspect ratio, with 1080p preferred if your equipment and connection allow. Each video file must be under 4.0 GB. Accepted file types are .mp4, .mov and .wmv, with MP4 strongly recommended, exported with the H.264 video codec and an AAC or MP3 audio codec. Every video must contain an audio track that plays from both the left and right channels — a mono track routed to one side is one of the most common rejections — and the audio must be clear enough not to distract students. To publish, the course needs at least 30 minutes of video content and at least 5 separate lectures. Udemy also runs a free Test Video service that reviews a sample of your audio and video before you record the whole course.
What resolution and frame rate should I record an online course at?
1920×1080 (1080p) at a constant 30 fps, 16:9. That clears every major platform's floor with room to spare: Udemy's minimum is 720p with 1080p preferred, Skillshare asks for 1080p widescreen, and Thinkific accepts anything between 640 and 3840 pixels wide at a constant 15–60 fps. Don't record at 60 fps for a talking-head or screen course — it roughly doubles the file size and buys nothing, because slides and code are slow-moving, high-contrast images that a codec handles easily. Don't record at 4K either: it's four times the file for content that gets streamed down to 1080p anyway, and on a laptop it's the setting most likely to cause dropped frames. Set the resolution before you press record; changing it mid-take can resize or corrupt the capture.
Do I need a microphone and a camera to sell an online course?
A microphone, effectively yes. A camera, no. Every platform's quality bar is written mostly about audio — Skillshare asks for audio free of hums, fuzziness, crackling and echo, and Udemy requires audio that isn't distracting and advises confirming your mic outputs stereo rather than mono — and a laptop's built-in mic sits inside a fan-cooled chassis, pointed at the ceiling, roughly 50 cm from your mouth. That's what produces the hollow, roomy sound students describe as amateur. Fix it with $30–70. Video is a different story: for screen-based subjects (software, spreadsheets, code, slides, maths) the screen capture is the video, and a webcam picture-in-picture is a nice-to-have that raises trust, not a requirement. If you do use the webcam, the laptop's own camera plus a window to your side is genuinely fine.
How long should each lecture in an online course be?
2–8 minutes, with 10 minutes as a hard ceiling for all but demonstrations. Skillshare states that classes average 20–60 minutes of total content broken into short 2–8 minute lessons, and the same shape works on Udemy, Teachable and Thinkific. There are three reasons beyond attention span. A short lecture is a short re-record when you make a mistake. A short lecture gives a student a place to stop, which is what makes them come back. And a short lecture forces you to have exactly one teachable idea per file, which is the single biggest quality difference between a first course and a fifth one. If a lecture outline needs the word "and" to describe it, it's two lectures.
Do I have to add captions to my online course?
You should generate them yourself rather than wait for the platform. Udemy auto-generates subtitles in English, French, German, Italian, Japanese, Spanish and Portuguese — but only after a course has received 20 or more enrolments on the marketplace, which means your first students see no captions at all unless you upload your own. Udemy accepts instructor-uploaded .vtt caption files and uses them in place of the auto-generated ones, and it requires subtitles for English, Spanish, Portuguese, French and Italian courses in the Udemy Business collection. Practically: generate captions locally as part of your edit pass, fix the ten or so technical terms the recogniser mangles, and upload the .vtt with each lecture. It takes a few minutes per video and it's also what makes your course searchable.
Can my laptop handle recording a full course without dropped frames?
Almost certainly, if you record 1080p30 rather than 4K or 60 fps, use the recorder's hardware encoder, and record to the internal SSD rather than an external drive or a synced cloud folder. Dropped frames on a modern laptop usually trace to one of four things: a Dropbox, iCloud or OneDrive folder syncing your growing capture file mid-take; a browser with dozens of tabs and a video call still open; recording a 4K or scaled Retina display at full resolution; or thermal throttling with the machine on battery. Plug it in, quit everything, point the output at a local folder, and record a 60-second test at your real settings before the first lecture — then check that test file's duration and dimensions rather than trusting the preview.
Sources
- Udemy — Video Standards (720p minimum, 16:9, under 4.0 GB per file, MP4 / H.264 + AAC or MP3)
- Udemy — Audio Standards (audio must play from both left and right channels)
- Udemy Business — Audio Standards and Choosing a Microphone (confirm the mic outputs stereo, not mono)
- Udemy — Udemy Course Quality Checklist (30 minutes of video, 5+ lectures, HD quality)
- Udemy — Supported File Types (.mp4, .mov, .wmv)
- Udemy — Watermarks and Links in Video: Quality Standards
- Udemy Teaching Center — Check your quality with the free Test Video service
- Udemy — Auto-Generated Subtitles FAQ (7 languages; generated after 20+ enrolments)
- Udemy — Adding Captions to Your Videos (.vtt uploads)
- Skillshare — Class Quality Guidelines (1080p, 16:9, audio free of hums and echoes)
- Skillshare — Outline Your Class (20–60 minutes total, 2–8 minute lessons)
- Thinkific — Recommended Specs for Exporting Videos (H.264, 5,000–8,000 kbps, constant 15–60 fps, AAC 44.1 kHz stereo)
- Thinkific — Video file size limit (2 GB)
- Teachable — Content File Types and upload limits
- Ryan Robinson — Best cheap USB microphones under $100 (Samson Q2U ≈ $69.95, Fifine K669 ≈ $27)
Free download for macOS and Windows. Annotate while you talk; auto subtitles when you finish.