Key takeaways
- Do Not Disturb is step one, not the whole job. It hides banners; it does not stop call windows, update prompts, IME popups or password dialogs.
- Turn it on: Windows 11 — Settings → System → Notifications → Do not disturb; Windows 10 — Settings → System → Focus assist; macOS — Control Center → Focus → Do Not Disturb.
- Hide desktop icons: Windows — right-click desktop → View → untick Show desktop icons. Mac —
defaults write com.apple.finder CreateDesktop -bool false; killall Finder. - Silence system sounds: Windows — Win+R →
mmsys.cpl→ Sounds tab → Sound Scheme: No Sounds. Mac — System Settings → Sound → off: Play user interface sound effects. - Lock the frame before you start: 1920×1080, 100–125% scaling, sleep and screen saver set to Never. Changing resolution mid-take can ruin the file.
- The fastest shortcut of all: record a window or a fixed region instead of the full desktop — then clutter, taskbar and stray banners are simply out of frame.
Advice about lighting and microphones is everywhere. What actually ruins finished lecture recordings is the state of your desktop: a chat notification sliding in over slide 12, a Windows Update restart prompt, a taskbar full of tab previews with a colleague's name in them, a folder called Grades_final_FINAL_v3 sitting on the wallpaper. This is the two minutes of desktop hygiene to do before you press record — the exact settings paths for Windows 11/10 and macOS, and, just as importantly, the pop-ups that Do Not Disturb doesn't catch.
The checklist: Windows vs Mac paths
Run this top to bottom. Every row is expanded in the sections below.
| Step | Windows 11 (Windows 10 in brackets) | macOS |
|---|---|---|
| Silence notifications | Settings → System → Notifications → Do not disturb (Win+N to toggle) [Settings → System → Focus assist → Alarms only] | Control Center → Focus → Do Not Disturb, or System Settings → Focus |
| Quit noisy apps | Fully quit Teams / Slack / WeChat / Outlook — closing the window isn't enough, check the system tray | Command-Q them; the red close button only hides the window (look for the dot under the Dock icon) |
| Pause OS updates | Settings → Windows Update → Pause updates (+ set Active hours) | System Settings → General → Software Update → ⓘ → turn off automatic install |
| Hide desktop icons | Right-click desktop → View → untick Show desktop icons | Terminal: defaults write com.apple.finder CreateDesktop -bool false; killall Finder |
| Hide the bar | Settings → Personalization → Taskbar → Taskbar behaviors → Automatically hide the taskbar | Desktop & Dock → auto-hide the Dock (⌥⌘D); Control Center → hide menu bar → Always |
| Mute system sounds | Win+R → mmsys.cpl → Sounds tab → Sound Scheme: No Sounds | System Settings → Sound → off: Play user interface sound effects |
| Clean the browser | Ctrl+Shift+B hides the bookmarks bar; close unrelated tabs; use a clean profile | ⌘⇧B hides the bookmarks / Favorites bar; same for tabs and profile |
| Lock the display | Settings → System → Display → 1920×1080, Scale 100–125% | System Settings → Displays → pick a 1920×1080 option (Retina defaults are not 1080p) |
| Stop sleep | Settings → System → Power & battery → Screen and sleep → Never (plugged in) | System Settings → Lock Screen → "Turn display off on power adapter…" and "Start Screen Saver when inactive" → Never |
| Test take | Record 10 seconds, stop, play it back at full size. Audio present? Smallest text legible? Anything in frame that shouldn't be? | |
1. Silence notifications
Start here, because it's the failure everyone has seen in someone else's lecture video.
Windows 11. Open Settings (Win+I) → System → Notifications and switch on Do not disturb. The fast route is Win+N, which opens the Notification Center where the Do not disturb button lives. While you're in Settings, expand Turn on do not disturb automatically and tick When I'm duplicating my display and When I'm using an app in full screen mode — that covers you the next time you forget, and it's the same rule set Microsoft shipped in Windows 10's Focus assist.
Windows 10. The feature is called Focus assist: Settings → System → Focus assist → Alarms only. The automatic rules underneath are the same ("When I'm duplicating my display", "When I'm playing a game", "When I'm using an app in full screen mode").
macOS. Click Control Center in the menu bar → Focus → Do Not Disturb, and pick a duration — For 1 hour suits a recording session. To make it automatic, open System Settings → Focus → Do Not Disturb and add a schedule or an app-based trigger.
Also decide which screen you're recording. Notification banners land on the main display, so if you teach from a laptop plus an external monitor, make the display you're not capturing the main one — or sidestep it entirely by recording a single window or region.
2. Kill the pop-ups DND doesn't block
Do Not Disturb suppresses notifications. Many interruptions aren't notifications — they're ordinary windows, and they'll open right on top of your slides:
- Incoming call windows. Teams, Zoom, Slack huddles and WeChat open a real window that DND won't touch. Quit the app rather than minimising it: on Windows check the system tray (the ^ arrow next to the clock); on macOS check for the dot under the Dock icon.
- OS update prompts. Windows: Settings → Windows Update → Pause updates (up to 5 weeks in the shipping builds; through 2026 Microsoft has been testing a pick-a-date pause of up to 35 days that can be extended indefinitely). Set Active hours to cover when you record, too. macOS: System Settings → General → Software Update → click the ⓘ beside Automatic updates and switch off installing updates automatically.
- App auto-updaters. Chrome's "relaunch to update", Zoom's update nag, Creative Cloud, Dropbox, antivirus and backup dialogs. If it isn't part of the lesson, quit it.
- The input-method pop-up. With more than one keyboard layout — or a Chinese/Japanese IME — the language switcher (Win+Space on Windows, Control-Space on macOS) and the candidate window can appear mid-sentence. Switch to the layout you'll teach in before you record, and remove layouts you never use: Windows → Settings → Time & language → Language & region; macOS → System Settings → Keyboard → Input Sources.
- Browser dialogs. "Save password?", autofill dropdowns showing your own email address, cookie banners, the download bubble. A clean browser profile fixes all four — see §5.
- Hardware prompts. USB device-connected chimes, printer dialogs, and the low-battery warning. Plug the laptop in.
One more that's easy to miss on macOS 14 Sonoma and later: "Click wallpaper to reveal desktop" defaults to Always, so a stray click on an empty area sweeps every window off-screen and reveals your desktop — on camera. Set System Settings → Desktop & Dock → Click wallpaper to reveal desktop to Only in Stage Manager and it can't happen.
3. Clear the desktop, taskbar and Dock
Two separate reasons to do this. It looks unprofessional, and it leaks information — file names with student names in them, a folder called Job applications, an email subject line in a taskbar preview. Anything a student can pause and screenshot is effectively published.
- Desktop icons — Windows. Right-click an empty area of the desktop → View → untick Show desktop icons. Nothing moves or is deleted; the icons just stop being drawn. Same toggle brings them back.
- Desktop icons — macOS. There's no menu toggle. Open Terminal and run:
defaults write com.apple.finder CreateDesktop -bool false; killall Finder
Restore afterwards withdefaults write com.apple.finder CreateDesktop -bool true; killall Finder. Separately, Finder → Settings → General controls whether hard disks and external drives appear on the desktop. - Taskbar — Windows. Settings → Personalization → Taskbar → Taskbar behaviors → tick Automatically hide the taskbar. In the same panel untick Show badges on taskbar apps and Show flashing on taskbar apps, so unread counts don't pulse at your students. Under Taskbar items, switch off Widgets and Search if the lesson doesn't need them.
- Dock and menu bar — macOS. System Settings → Desktop & Dock → Automatically hide and show the Dock (shortcut ⌥⌘D). Then System Settings → Control Center → Automatically hide and show the menu bar → Always. That also hides the clock — which matters if you record a lesson across several takes, because a clock jumping from 21:14 to 23:40 between cuts is the classic continuity giveaway.
- Wallpaper. Swap the family photo for a plain colour or a neutral image. It reads as deliberate, and annotations show up better against it.
- Close stray windows. File Explorer / Finder windows, your email client, yesterday's marking spreadsheet. If you're capturing the full screen, everything behind your slides is one Alt-Tab away from being in the video.
4. Mute system and alert sounds
If you record system audio — and you often should, for anything with sound in it — every error ding, connect chime and email whoosh goes straight into the mix. Even recording mic-only, a loud alert makes you flinch mid-sentence.
Windows. Press Win+R, type mmsys.cpl, press Enter, open the Sounds tab, set Sound Scheme to No Sounds, untick Play Windows Startup sound, click OK. (The same dialog is reachable through Settings → Personalization → Themes → More sound settings, or Settings → System → Sound → More sound settings — the Run command is just faster.) If you'd rather silence one offender than everything, use Settings → System → Sound → Volume mixer.
macOS. System Settings → Sound → turn off Play user interface sound effects and drag Alert volume down. Turning off "Play feedback when volume is changed" also stops the pop-pop-pop if you adjust volume while recording.
Then check the opposite direction: your microphone must be the device you think it is. Windows → Settings → System → Sound → Input; macOS → System Settings → Sound → Input. Plugging in a webcam or headset re-points the default input surprisingly often, and the first you'll know about it is playback.
5. Tidy the browser
If any part of the lesson happens in a browser, give it its own pass — it's the most information-dense thing on your screen.
- Hide the bookmarks bar. Ctrl+Shift+B (Windows) or ⌘⇧B (Mac) in Chrome, Edge and Firefox; ⌘⇧B toggles the Favorites bar in Safari. Bookmark titles are more revealing than people expect.
- Close unrelated tabs. Tab titles are readable even when inactive, and a 30-tab strip makes every title illegible anyway.
- Use a clean profile or a guest window. A fresh Chrome profile means no bookmarks bar, no extension icons, no autofill carrying your email address, no logged-in accounts. It's the one-step version of this whole list.
- Zoom in. Ctrl/⌘ and "+" to 125–150%. What's comfortable on your 27-inch monitor is unreadable on a student's phone after video compression.
- Go full screen — F11 on Windows, ⌃⌘F on Mac — to drop the tab strip and address bar entirely, unless showing navigation is part of the point.
6. Lock resolution, scaling and sleep
Decide the frame before you record: changing display settings mid-recording can resize or corrupt the capture, and re-recording costs more than every item on this list put together.
Windows. Settings → System → Display. Set Display resolution to 1920×1080 and Scale to 100% or 125%. On a 13–14 inch laptop, 125% keeps menus and code legible after compression; past 150% it starts to look like the screen was zoomed for you rather than for the student.
macOS. System Settings → Displays. Retina Macs don't report a plain 1080p by default — a 14-inch MacBook Pro's default "looks like" setting is roughly 1512×982, so a full-screen capture isn't a 1920×1080 frame. Either choose a 1920×1080 option from the resolution list (use Advanced → Show resolutions as list to see them all) or record a fixed 16:9 region and let the recorder output 1080p. Check the exported file's dimensions once, then stop thinking about it.
Stop the screen going dark. Windows: Settings → System → Power & battery → Screen and sleep → set the plugged-in options to Never. macOS: System Settings → Lock Screen → set Turn display off on power adapter when inactive and Start Screen Saver when inactive to Never. A screen saver starting during a long take is rare and fatal — you usually only notice at export.
The 30-second final pass
Everything above is a setup you can keep. This is the bit to run before every recording:
- Do Not Disturb on? Windows shows a bell with a line through it near the clock; macOS shows the Focus icon in Control Center (the menu bar may now be hidden — check there).
- Everything you don't need: quit. Not minimised. Quit.
- Plugged in, and the right microphone selected.
- Open exactly the windows the lesson uses, in the order you'll use them, and nothing else.
- Record 10 seconds and watch it back full size. Audio there? Smallest text readable? Anything in frame that shouldn't be? This single habit catches more problems than every other item combined.
Then teach. If your recorder supports pause, use it instead of stopping — a paused take is far easier to resume than a second file to stitch.
Something popped up mid-take — re-record?
Usually not. A banner is on screen for two or three seconds, and cutting those seconds normally leaves the sentence either side intact. Re-record only in two cases: the pop-up showed something that can't leave your machine (a message preview, a student's name) and it sits on top of content you can't cut, or the interruption derailed you and the next minute of narration is a mess. Otherwise, trim it in the editor and move on.
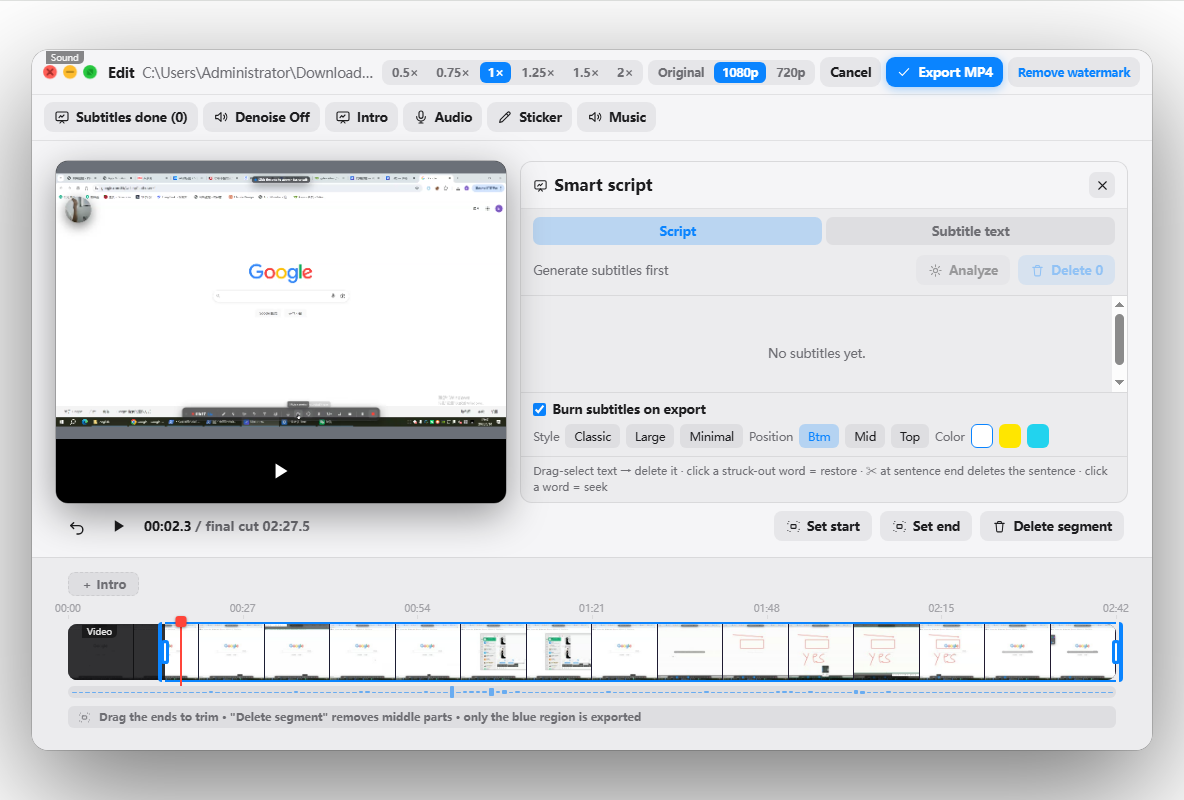
A tidy desktop only gets you a clean raw file. Penbeam covers the rest of the lesson workflow: record screen and webcam together, draw and zoom while you talk, then generate subtitles locally and offline (nothing is uploaded), cut silences and "um/uh" in one pass, and export an MP4 for your LMS. It runs on macOS 12.3+ and Windows 10+, with a free tier (10 minutes per recording, watermarked) and Pro from $39.99/year with an education discount. See the features page, or download it from lecta.cc/download.
FAQ
What should I set up on my computer before recording a lecture?
Six things, in this order: (1) turn on Do Not Disturb — Windows 11: Settings → System → Notifications → Do not disturb; Windows 10: Settings → System → Focus assist; macOS: Control Center → Focus → Do Not Disturb; (2) quit chat apps and pause Windows Update, because Do Not Disturb does not block app windows or restart prompts; (3) hide desktop icons and auto-hide the taskbar or Dock; (4) silence system sounds — Windows: Win+R → mmsys.cpl → Sounds tab → Sound Scheme: No Sounds; macOS: System Settings → Sound → turn off "Play user interface sound effects"; (5) hide the browser bookmarks bar (Ctrl+Shift+B on Windows, ⌘⇧B on Mac) and close unrelated tabs; (6) set the display to 1920×1080 at 100–125% scaling and set sleep and the screen saver to Never. Then record a 10-second test and play it back. The whole pass takes about two minutes.
How do I stop notifications from appearing in a screen recording?
On Windows 11, open Settings → System → Notifications and switch on "Do not disturb" (fastest route: press Win+N and click the Do not disturb button). Expand "Turn on do not disturb automatically" and tick "When I'm duplicating my display" and "When I'm using an app in full screen mode" so it happens by itself next time. On Windows 10 the same feature is Settings → System → Focus assist, set to "Alarms only". On macOS, click Control Center in the menu bar → Focus → Do Not Disturb, or set it up in System Settings → Focus. Recent macOS versions also suppress Notification Center banners while the screen is being shared, mirrored or recorded — as long as System Settings → Notifications → "Allow notifications when mirroring or sharing the display" stays switched off, which is the default.
Does Do Not Disturb block everything during a recording?
No, and this is what catches most teachers out. Do Not Disturb suppresses notification banners only. It does not stop an incoming Teams or Zoom call window, a Windows Update "restart now" prompt, an app's own updater dialog (Chrome, Zoom, Creative Cloud), antivirus or backup pop-ups, the input-method candidate window when you switch keyboard languages, browser "save password" and autofill dropdowns, USB device-connected prompts, or the low-battery warning. So: quit the apps you're not using, pause OS updates, and plug the laptop in.
How do I hide desktop icons before recording?
On Windows, right-click an empty area of the desktop, choose View, and untick "Show desktop icons" — the files stay where they are, they just stop being drawn. On macOS there's no menu toggle; open Terminal and run defaults write com.apple.finder CreateDesktop -bool false; killall Finder. Restore them afterwards with the same command using true instead of false. Better still, avoid the problem: record a single window or a fixed region instead of the whole desktop.
What resolution and scaling should I record a lecture at?
Target 1920×1080 (1080p) — what most LMS platforms and YouTube expect. Windows: Settings → System → Display, set Display resolution to 1920×1080 and Scale to 100% or 125% (125% keeps menus and code legible on a 13–14 inch laptop). On a Retina Mac the default "looks like" resolution is not 1080p — a 14-inch MacBook Pro defaults to roughly 1512×982 — so either choose a 1920×1080 option in System Settings → Displays or record a fixed 16:9 region and let the recorder output 1080p. Set this before you start: changing resolution or plugging in a monitor mid-recording can resize or garble the capture.
Should I hide the taskbar and the Dock while recording?
Yes, if you're capturing the full screen. Windows: Settings → Personalization → Taskbar → Taskbar behaviors, tick "Automatically hide the taskbar", and untick "Show badges on taskbar apps" and "Show flashing on taskbar apps" so unread counts don't blink at your students. macOS: System Settings → Desktop & Dock → "Automatically hide and show the Dock" (shortcut ⌥⌘D), and System Settings → Control Center → "Automatically hide and show the menu bar" → Always. Hiding the menu bar also hides the clock, which matters if you record a lesson in several takes — a clock jumping between cuts is the classic continuity giveaway.
Sources
- Microsoft — Focus: stay on task without distractions in Windows (automatic activation rules)
- Apple — Change Notifications settings on Mac (including "Allow notifications when mirroring or sharing the display")
- Der Flounder (Rich Trouton), 24 Feb 2025 — Allowing Notification Center notifications to appear during screen recordings on macOS Sequoia
- Macworld — How to stop windows disappearing when you click the desktop in macOS Sonoma
- macOS defaults — com.apple.finder CreateDesktop (show/hide all desktop icons)
- Digital Citizen — Windows 11 pause updates: the 5-week limit and the 2026 pick-a-date change
- The Windows Club — How to disable or change sounds in Windows 11/10 (Sound Scheme → No Sounds)
Free download for macOS and Windows. Annotate while you talk; auto subtitles when you finish.