Key takeaways
- It's a chain of three links: writing device → canvas app → recorder. Most bad handwriting videos have one weak link, not a bad teacher.
- Cheapest workable device: a screenless pen tablet, roughly $40–60 (Huion Inspiroy 2, XPPen Deco 01 V3). Most natural: iPad + Apple Pencil (USB-C $79, Pencil Pro $129).
- iPad as a Mac writing surface: Sidecar (macOS 10.15+, iPadOS 13+, same Apple ID with 2FA) — use the cable. Or AirPlay to Mac (Monterey+). Or QuickTime → New Movie Recording → iPad as Camera.
- Two driver settings decide whether a pen tablet feels right: map it to one monitor, and turn on force proportions.
- Canvas: slides for statements, blank canvas for derivations. OneNote (Ink to Math needs a Microsoft 365 Enterprise/Education subscription), Freeform, or the free open-source Xournal++.
- Recording settings that matter: 1920×1080, 30 fps, 4–6 px stroke, letters ~40 px tall. Frame rate matters far less than stroke width.
Search for this and you get two kinds of page: a university media-services page about the lightboard studio you can book if you happen to work there, and a scattering of videos about writing on an iPad. Neither tells you the thing you actually need, which is how the whole chain fits together — what you write with, what you write on, and what records it — and which combinations quietly don't work. That's this page. It covers every device tier from a $40 tablet to a lightboard, the canvas apps worth using, and the recorder settings that decide whether your ink is legible on a student's phone.
The chain: device → canvas → recorder
Three links, each of which can be chosen independently:
- The writing device — what your hand holds. Pen tablet, pen display, iPad and Apple Pencil, touchscreen laptop, or actual paper with a camera pointed at it.
- The canvas — what the ink lands in. A note app, a whiteboard app, a PDF you're annotating, a slide deck, or the recorder's own drawing layer.
- The recorder — what turns it into an MP4, together with your voice, your webcam and (afterwards) captions.
Almost every failure is a mismatch between two links. Writing beautifully on an iPad and then screen-recording it on the iPad, where your desktop slides and your good microphone live on the Mac. Buying a pen display and then annotating in an app with a 12-pixel-wide highlighter that covers your working. Or the most common one: skipping the device entirely and drawing with a trackpad.
Step 1: pick the writing device
Ordered by cost. The honest summary is that the jump from no device to any pen device is worth ten times more than any jump between pen devices.
| Device | Rough cost | Best for | Watch out for |
|---|---|---|---|
| Mouse / trackpad | $0 | Circles, arrows, underlines — marking up, not writing | Handwriting is genuinely unreadable. Don't try to write equations with one. |
| Screenless pen tablet (Huion Inspiroy, XPPen Deco, Wacom Intuos) | ~$40–60 | The default recommendation. Full-page derivations on the machine you already teach from. | Hand-eye disconnect for the first ~20 minutes. Needs two driver settings (below). |
| Touchscreen laptop / 2-in-1 (Surface, convertible PCs) | Already owned | Writing directly on the thing being recorded — zero extra links in the chain. | Set the app to pen-only input or your palm draws too. The screen is also your camera angle. |
| iPad + Apple Pencil | Pencil $79–129 (+ iPad) | The best writing feel there is, plus handwriting-to-math apps. | Getting it into the recording is the real work — see the next section. |
| Pen display (Wacom One / Cintiq, Huion Kamvas) | $200–1,500+ | People who write on screen every day and want no hand-eye gap. | Desk space, a second display cable, and a large cost step for a small teaching gain. |
| Paper + document camera (or iPhone Desk View) | $0–150 | Teachers who think on paper; worked examples, marking, lab notebooks. | Lighting, shadows and focus. The ink can't be edited afterwards. |
| Lightboard / learning glass | DIY under $100–150; institutional builds $600–700; commercial $2,000–9,000 | Face-to-camera teaching with writing floating between you and the student. | A room, a dark background, mirror-flipping the video, and neon markers. Not a screen-recording workflow at all. |
On the lightboard row: it's the option most likely to be dangled in front of you by a media-services page, and the one least likely to fit a weekly recording habit. Educators have documented builds for under $100 and university installations in the $600–700 range, with commercial units running to several thousand — but you still have to go to the room, dim it, and flip the footage. Excellent for a set-piece explainer. Wrong tool for "I need Thursday's problem set worked through by tonight."
The iPad route, in detail
If you already own an iPad and an Apple Pencil, you own the nicest writing surface on this list. The question is only how the ink reaches the recording. Three routes, in order of how much I'd trust them mid-lesson.
1. Sidecar — the iPad becomes a Mac display you draw on. Your Mac app (Freeform, OneNote, a PDF, PowerPoint) is dragged onto the iPad screen and you write into it with the Pencil; because it's still a Mac window, your Mac-side recorder captures it like anything else. Requirements: macOS 10.15 Catalina or later and iPadOS 13 or later, generally a Mac from 2016 or later, both devices signed into the same Apple ID with two-factor authentication, and — wirelessly — within about 10 metres (30 feet) with Bluetooth, Wi-Fi and Handoff on. Connect the cable anyway. Wireless Sidecar is fine for reading a palette; the moment you write by hand, the latency is the difference between "this feels like a pen" and "this feels wrong and I keep over-correcting."
2. AirPlay to Mac — mirror an iPad app onto the Mac and record that. Use this when the app you want lives on iPad only (GoodNotes, MyScript Notes, Notability). AirPlay Receiver needs macOS Monterey or later on a MacBook Air or MacBook Pro from 2018 or later, iMac 2019+, Mac mini 2020+, iMac Pro 2017 or Mac Pro 2019; sending devices include iPad Pro (2nd gen and later), iPad Air (3rd gen and later), iPad (6th gen and later) and iPad mini (5th gen and later). Note Apple's own caveat that older models may share at a lower resolution — check the sharpness of a small subscript before you record twenty minutes.
3. QuickTime as a wired capture card. Plug the iPad into the Mac, open QuickTime Player → File → New Movie Recording, click the arrow beside the record button and choose the iPad under Camera. The iPad screen appears in a Mac window. This is the most robust of the three because nothing depends on the network — and you don't have to record in QuickTime: leave that window open as your "canvas" and let your normal recorder capture it along with your webcam and microphone.
And the paper option. If your instinct is to work on paper, macOS will do it without a document camera: Desk View uses the iPhone's ultra-wide camera to show your face and your desk at once. It needs an iPhone 11 or later (excluding SE models) — the ultra-wide lens is the requirement — plus iOS 16 and macOS Ventura or later, both signed into the same Apple ID with two-factor authentication, Wi-Fi and Bluetooth on. Mount the phone above the desk, put the Desk View window on screen, and record the screen as usual; the paper is now just another window in your layout.
The pen tablet route, in detail
For most teachers this is the answer: a screenless tablet, connected by USB, next to the keyboard. Entry-level models sit around $40–60 — the Huion Inspiroy 2 has been listed at $39.99 and the 10×6-inch XPPen Deco 01 V3 around $46.96 — and the specifications people compare are the ones that matter least for handwriting. Pressure levels get advertised at 8,192 or 16,384; the battery-free Wacom One pen's 4,096 levels are already far beyond what writing an integral sign uses. Buy on writing area and build, not on pressure numbers.
Two driver settings do more for the experience than any hardware upgrade:
- Map the tablet to one monitor. By default the tablet's surface may be stretched across your entire desktop, so on a two-screen setup half your tablet controls a screen you're not recording. Open the driver — Wacom Tablet Properties → Mapping → Screen Area, or the Work Area / Monitor tab in the Huion and XP-Pen drivers — and pin it to the display you're capturing.
- Turn on "force proportions." A 10×6-inch tablet is 5:3; your screen is 16:9. Without this option the mapping stretches horizontally, so circles come out as ellipses and your handwriting slants in a way you'll notice on playback but not while writing. With it on, you lose a strip of tablet surface and gain handwriting that looks like yours.
Then budget twenty minutes of practice, once. Writing while looking at a screen instead of your hand is a genuine motor skill; it feels hopeless for about ten minutes, workable at twenty, and normal by the end of your second lesson. Write the alphabet, then a page of equations, at the size you'll actually use. Nearly everyone who "tried a graphics tablet and hated it" quit inside those first ten minutes.
One more tip that costs nothing: shrink the active area in the driver to roughly the size of a postcard. Full-tablet mapping means big arm movements for small letters; a smaller active area keeps the motion in your wrist, which is where your handwriting lives.
Step 2: pick what you write on
The canvas decides how the lesson is paced, which matters more than it sounds. A slide with the full derivation already printed on it answers the question before you've asked it; a blank canvas that fills up as you talk keeps the student a half-step behind you, which is exactly where you want them.
| Canvas | Why pick it | Cost / catch |
|---|---|---|
| Recorder's whiteboard / annotation layer | Nothing to switch to; draw over slides, a browser or an IDE, then flip to a blank board and back mid-recording | Ink usually isn't saved as an editable document — it lives in the video |
| OneNote | Infinite page, ruled backgrounds, and Ink to Math / Math Assistant for converting and solving handwritten equations | Math Assistant requires a Microsoft 365 subscription (Enterprise or Education) and can be switched off by an admin |
| Apple Freeform | Free, infinite canvas, syncs Mac/iPad — ideal with Sidecar | No math recognition; light on structure for long derivations |
| Xournal++ | Free and open source, Windows/macOS/Linux, offline with no account, pressure-sensitive pen support, strong PDF annotation | Plain interface; PDF-page model rather than an infinite canvas |
| MyScript Notes (formerly Nebo) | Best-in-class handwritten math recognition; exports to LaTeX in the paid tier | Free with in-app purchases; iPad/Windows, so it needs the mirroring step |
| PowerPoint / Keynote ink | Write straight onto the slide you're already presenting; annotations can be kept | A slide is a fixed frame — you run out of space exactly when the algebra gets long |
If you want the ink-to-math trick, test it on your own account first. In OneNote you lasso the handwritten equation with Lasso Select, then use Ink to Math on the Draw tab to convert it to a typed equation, and Math to get solution steps and a graph. It works in OneNote on Windows, OneNote for iPad and OneNote on the web — but it's tied to a Microsoft 365 Enterprise or Education subscription, and tenant privacy or connected-experience policies can disable it. Nothing is more deflating on camera than a feature that worked at home and is greyed out on the school account.
Step 3: record the strokes
The recorder's job here is narrower than usual, and there are only a few things it must do:
- Capture the canvas region cleanly. Record the app window or a fixed 16:9 region rather than the whole desktop — the tidiest way to keep tool palettes, the Dock and stray notifications out of the frame. (The rest of that pass is in our lecture recording setup checklist.)
- Let you draw over anything, not just inside the note app. Half of maths teaching is marking up something that already exists — a printed formula, a graph, a screenshot of a student's working. A live annotation layer means you circle it where it is instead of copying it into a whiteboard first.
- Keep your face in frame if that's your style. A small webcam PiP in a corner while you write is fine; just park it where your working never reaches, usually bottom-left if you write left-to-right and top-down.
- Pause, not stop. Long derivations invite mistakes. A pause key lets you sort yourself out and resume in the same file instead of stitching two takes later.
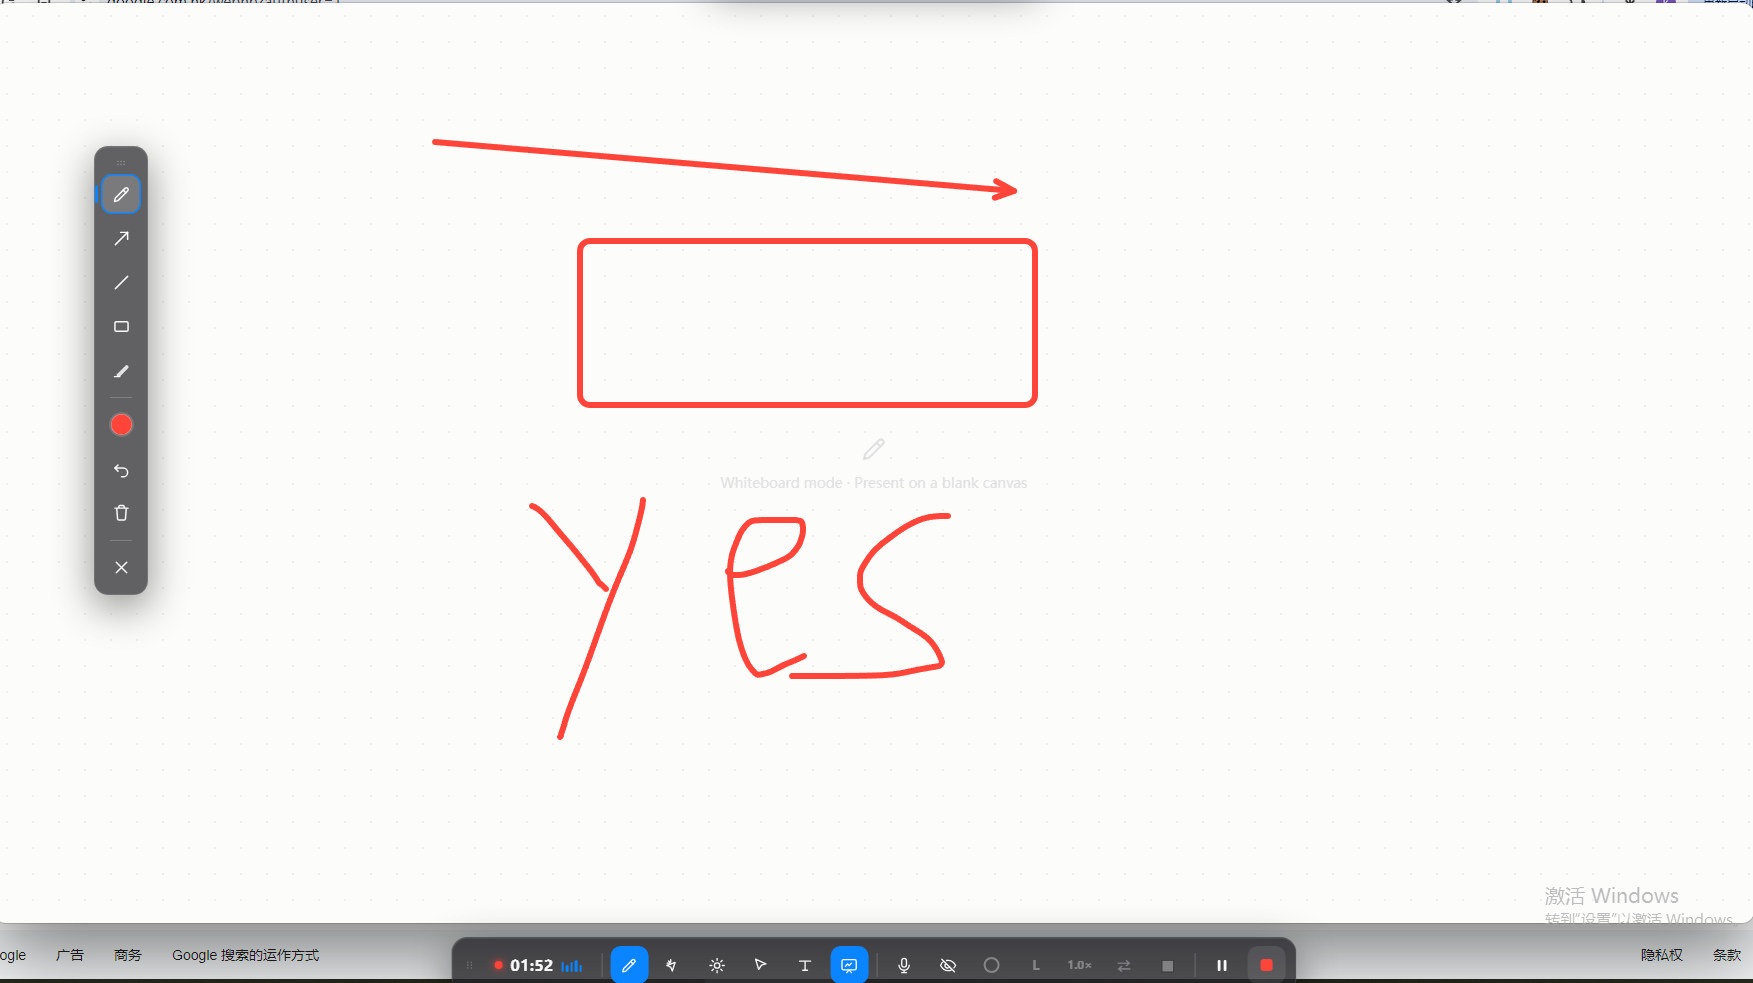
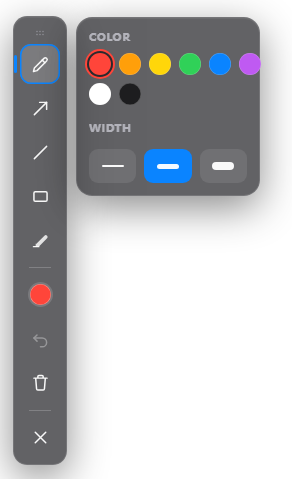
Settings. Record at 1920×1080; 30 fps is plenty. Handwriting is slow, high-contrast movement — the easy case for a codec — and 60 fps mostly buys you a bigger file. Set the pen to 4–6 px and pick a dark ink on a light background (or the reverse), because thin, pale, anti-aliased strokes are the first thing video compression throws away. Two or three colours maximum: one for the working, one for the answer, one for the warning. And decide in advance whether the mouse cursor should be visible — with a pen tablet, an arrow drifting around the page while you talk is a distraction you'll never stop noticing once you see it.
Making math legible on video
Notation has failure modes ordinary text doesn't. These are the ones that survive to the finished video:
- Write two to three times larger than feels natural. Target a lowercase letter around 1/25 of the frame height — roughly 40 px in a 1080p export. Your monitor is 27 inches away from your face; the student's phone is a 6-inch screen on a bus.
- Subscripts, primes and hats are the first casualties. If x₁ and xᵢ both matter in the same lesson, say them aloud every time — "x sub one", "x sub i" — because the captions carry what the pixels lose.
- Leave the previous step visible. The single most common complaint about handwritten video lessons is that the board is wiped a beat too early. Scroll rather than clear, and when you do clear, say so.
- Use colour semantically, not decoratively. Same colour for the same role every time — substitutions in one colour, results in another. Random colour changes read as noise.
- Don't narrate in real time while writing long expressions. Write the line, then talk about it. Speech that stretches to cover the mechanics of writing is what turns a 6-minute explanation into 14 minutes of "and then we have… um… this over… that."
Two things to fix afterwards rather than on the take: silences while you write, and filler words. Both are near-universal in handwriting videos precisely because writing takes longer than talking — and both are a one-pass edit, not a re-record.
A 20-minute derivation, start to finish
- Wire the chain. Tablet plugged in and mapped to one monitor with force proportions on; or iPad on the cable with Sidecar running; or the paper under Desk View.
- Set the canvas. Open the note app, set the pen to 4–6 px, pick your two or three colours, zoom the page so your natural handwriting is about 40 px tall on a 1080p frame.
- Pre-write the scaffolding. Put the problem statement, the axes, the diagram or the given equation on the page before you record. Nobody needs to watch you draw a coordinate grid.
- Ten-second test. Record ten seconds, write one line, stop, play it back full size. Is the ink crisp? Is your voice on the track? Is the tool palette in shot? This one habit prevents most re-records.
- Record the derivation. One idea per screenful. Scroll instead of clearing. Pause — don't stop — if you lose the thread.
- Mark up, don't rewrite. When you need to point at something that's already there, switch to the annotation layer and circle it in place.
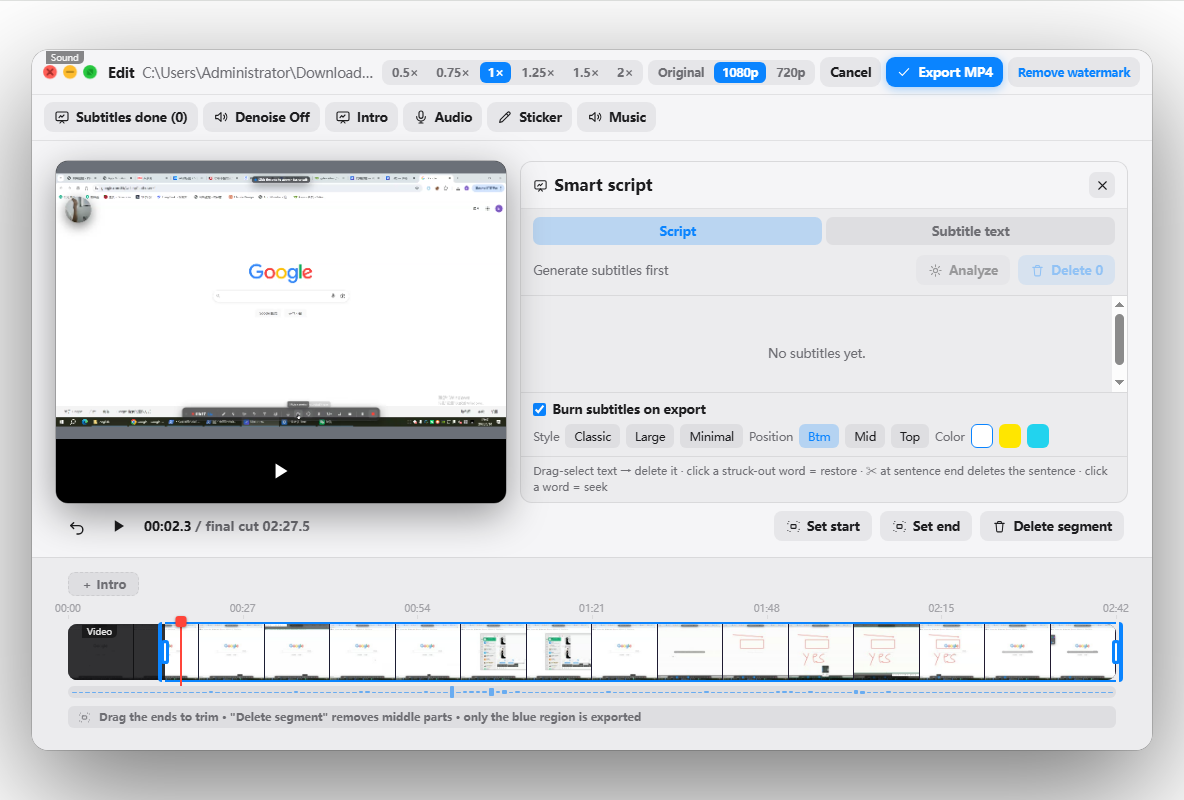
- Clean up. Cut the long writing silences and the filler words, then generate captions — essential here, because spoken notation ("x sub i", "d by d t") is the only searchable form your algebra will ever have.
- Export 1080p MP4 and check one small subscript at phone size before you upload.
Five ways this goes wrong
- Recording the iPad on the iPad. The ink looks great and the audio, the slides, the webcam and the editing are all on the other machine. Mirror the iPad into the desktop recording instead.
- Skipping the driver setup. An unmapped, unproportioned tablet is what "graphics tablets feel horrible" actually means. Two checkboxes.
- Writing at your monitor's comfortable size. Legible at 27 inches, mush at 6 inches, and worse after compression.
- Clearing the board too fast. The student is a step behind you by design; wiping the previous line strands them there.
- Building the lesson on a feature you haven't tested on the work account. Ink to Math is the classic — brilliant at home, disabled by policy at school.
If you'd rather keep the chain to two links instead of three, that's what a teaching-focused recorder is for. Penbeam gives you the canvas and the recorder in one app: a whiteboard mode to derive on, a live annotation layer to draw over slides, PDFs or anything else on screen, webcam picture-in-picture, then subtitles generated locally and offline (nothing is uploaded) and one-click removal of silences and filler words — the two things every handwriting video is full of. It runs on macOS 12.3+ and Windows 10+, works with any pen tablet or pen display your OS already recognises, and is free to try at 10 minutes per recording, with Pro from $39.99/year and an education discount. See the features page, compare on pricing, or download it from the download page. If you're setting up a full course rather than one video, our guides on making educational videos and flipped-classroom videos pick up where this one stops.
FAQ
What is the best way to record handwriting and math on screen?
Chain three things together. (1) A writing device: a pen tablet without a screen is the cheapest workable option — Huion Inspiroy 2 and XPPen Deco 01 V3 sell in the $40–60 range — while an iPad with an Apple Pencil (USB-C model $79, Pencil Pro $129) is the most natural to write on. A mouse or trackpad is not a writing device; handwriting done with one is unreadable. (2) A canvas: OneNote, Apple Freeform, the free open-source Xournal++, or the whiteboard mode built into your screen recorder. (3) A recorder that captures the canvas as you write, ideally with a live annotation layer so you can also mark up slides and PDFs without switching apps. Record the screen at 1920×1080, write two to three times larger than feels natural, and use a 4–6 px stroke so the ink survives video compression.
Can I use an iPad as a writing tablet for my Mac while recording?
Yes, three different ways. Sidecar turns the iPad into a second Mac display you can draw on with an Apple Pencil; it needs macOS 10.15 Catalina or later, iPadOS 13 or later, both devices signed into the same Apple ID with two-factor authentication, and within about 10 metres if you go wireless — use the cable, because it removes the lag that makes handwriting feel wrong. Alternatively, write in an iPad app and send the iPad screen to the Mac: AirPlay to Mac needs macOS Monterey or later on a MacBook Air/Pro from 2018 or later, iMac 2019 or later, Mac mini 2020 or later, iMac Pro 2017 or Mac Pro 2019. Or connect the iPad by cable and use QuickTime Player → File → New Movie Recording, then pick the iPad under Camera — the most reliable option, because it's wired. In all three cases the Mac-side recorder captures the result, so your webcam, microphone and subtitles keep working normally.
Is a cheap graphics tablet good enough for writing math in a lecture video?
Yes. For handwriting you need accurate position and a comfortable writing area, not 16,384 levels of pressure — an entry-level tablet like the Huion Inspiroy 2 (around $40) or XPPen Deco 01 V3 (around $47) is enough, and even the battery-free Wacom One pen's 4,096 pressure levels are far more than handwriting uses. Two setup steps matter more than the model. First, map the tablet to one monitor only, in the driver's mapping or work-area panel, so the pen doesn't stretch across a two-screen desktop. Second, turn on force proportions, because a 10×6-inch tablet is 5:3 and your screen is 16:9 — without it your circles come out as ellipses and your handwriting slants. Then spend twenty minutes writing the alphabet and a few equations to retrain the hand-eye disconnect of looking at the screen while your hand moves on the desk.
How do I convert handwritten equations to typed math while recording?
OneNote's Math Assistant does it: lasso-select the handwritten equation with the Lasso Select tool, then click Ink to Math on the Draw tab to convert it to a typed equation, and Math to get solution steps and a graph. The catch for a lecture recording is licensing — the feature requires a Microsoft 365 subscription (Enterprise or Education), it works in OneNote on Windows, OneNote for iPad and OneNote on the web, and an administrator can switch it off through connected-experience or privacy policies. Check it works on your account before you build a lesson around it. MyScript Notes (formerly Nebo) is the alternative on iPad and Windows: it recognises handwritten math and exports to LaTeX in its paid tier. If neither is available, just write the equation and say it out loud — recognition is a nice demo, not a requirement.
Should I write on a whiteboard app or annotate directly on my slides?
Both, for different jobs, and the difference matters for pacing. Annotating slides — circling a term, drawing an arrow, writing a substitution next to a printed formula — keeps the finished material intact and works well when the slide already carries the content. A blank canvas is better for anything you actually derive step by step, because a fully printed slide answers the question before you've asked it, and students stop thinking. The practical rule for a maths or physics lesson: put definitions, statements and diagrams on slides, and derive on a blank canvas. A recorder with a live annotation layer plus a whiteboard mode lets you switch between the two mid-recording without stopping or changing app.
What frame rate and resolution should I use for recording handwriting?
1920×1080 at 30 fps is the right default. Handwriting is a slow-moving, high-contrast image, which is the easy case for a video codec; 60 fps roughly doubles the file size and buys almost nothing unless you scroll or animate a lot. What actually decides whether the ink is readable is stroke width and character size, not frame rate: use a 4–6 px pen and write so that a lowercase letter is at least about 1/25 of the frame height, which on a 1080p export means roughly 40 px tall. Anti-aliased thin ink on a white background is exactly what compression discards first, so a thin, pale, small hand is the one combination guaranteed to turn to mush on a student's phone.
Sources
- Apple — Use an iPad as a second display for a Mac (Sidecar requirements)
- Apple — Continuity features and requirements for Apple devices
- Apple — Set up your Mac to be an AirPlay receiver (supported models)
- Apple — Use Desk View to show your face and desk on camera
- Apple — Record a movie in QuickTime Player on Mac (iPad as camera source)
- Apple Newsroom, Oct 2023 — Apple introduces new Apple Pencil (USB-C, $79)
- Microsoft — Create math equations using ink or text with Math Assistant in OneNote
- Wacom — Wacom One pen tablet (battery-free pen, 4,096 pressure levels, tilt)
- Creative Bloq — Back-to-school drawing tablet deals (Huion Inspiroy 2 $39.99, XPPen Deco 01 V3 $46.96)
- Xournal++ — Free, open-source handwriting and PDF annotation for Windows, macOS and Linux
- MyScript — MyScript Notes (formerly Nebo): handwritten math recognition and LaTeX export
- Flipped Learning Network — How to make a lightboard for less than $100
- University of Kansas CTE — Lightboard: a new tool for creating online learning material (build cost)
Free download for macOS and Windows. Annotate while you talk; auto subtitles when you finish.